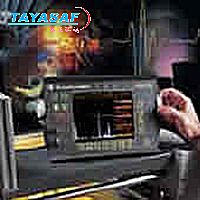
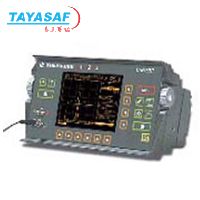
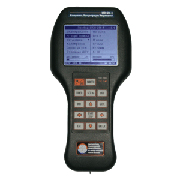
Boltstress超声波螺栓应力测试仪
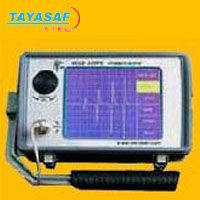
Boltstress G5 Ultrasonic Bolt Tension Measurement System
Measuring
Units: English & Metric / Farenheit & Centigrade
Range: From 1 in to 96 in (2.54 mm to 2438 mm) bolts.
Elongation: Change in length (inches/millimeters).
Load: Force load applied (pounds Force lbsF or Kilonewtons Kn).
Stress: Force for unit area stress applied (pounds per square inch or newtons per square millimeter Mpa).
Strain: Percentage Elongation over Effective Length (%)
Time: Nanoseconds.
Data Logger (Internal)
Total of 8,000 readings, multiple bolt groups. Stores both waveform views, nanoseconds, elongation, load, stress and strain for each reading.
Memory: 16 megabit non-volatile ram.
Alarm Limits: Set Hi and Lo tolerances with audible beeper, viewable scan bar, and visual LEDs.
Auto Set: Locates the detection signal, optimizes the gain setting, and adjusts the overall display to show the waveform and detection point automatically.
Field Calibration: Vector & linear regression.
Setups: 64 custom user defined setups. Factory setups can also be edited by the user.
Gate: Gate used to fine adjust where the detection point occurs.
Physical
Size: Width (2.5in/63.5mm) Height (6.5in/165mm) Depth (1.24in/31.5mm)
Weight: 13.5 ounces (with batteries).
Display: Membrane switchpad with twelve tactile keys.
Operating Temperature: 14°F to 140°F (-10°C to 60°C).
Case: Extruded aluminum body with nickel-plated aluminum end caps (gasket sealed).
Data Output: Bi-directional RS232 serial port. Windows® PC interface software.
Display: 1/8 in VGA grayscale display (240 pixels x 160 pixels). Viewable area 2.4in x 1.8in (62mm x 45.7mm) EL backlit (on/off/auto).
Ultrasonic Specifications
Measurement Modes: Pulse-Echo (standard) Pulse-Echo w/Gate (fine adjust)
Pulser: Square wave pulser with adjustable pulse width (spike, thin, wide).
Receiver: Manual or Auto Set gain control with 40dB range.
Timing: 10-bit 250 MHz digitizer.
Resolution: +/- 0.00001in (0.00001 mm)
Velocity Range: 0.0492 to .3937 in/ms (1250 to 9,999 meters/sec) Fixed, single, and Two point zero calibration options. Select bolt material types from a preset or custom list.
Display
A-Scan-Rectified +/- (half wave view), or RF (full waveform view).
Large Digits: Display and toggle between nanoseconds, elongation, load, stress, and strain.
Digit Height: 0.400 in. (10mm.).
Limits Bar (alarm limits): Set Hi & Lo alarm limits for displaying an acceptable tolerance range.
Repeatability Bar Graph: Bar graph indicates stability of measurement.
Power Source
Three 1.5V alkaline or 1.2V NiCad AA cells.
Typically operates for 150 hours on alkaline and 100 hours on NiCad (charger not included).
Auto power off if idle for 5 min. Battery status icon.
Transducers
Transducer types: Single element (1 MHz to 10 MHz & 1/8in to 1in diameters).
Locking quick disconnect "00" LEMO connectors.
Standard 10 foot cable. Custom transducers available for special applications.
Temperature probe for automatic temperature compensation.
Certification
Factory calibration traceable to national standards.
Warranty
2 year limited.
Applications
Our system is primarily one of prevention; the applications below are only a few examples of our experience.
Mills
The structural joints on Ball, Rod & SAG Mills are highly critical. There are several known cases where torque alone has been relied on and the consequences have been dire. Joint separation occurs causing leakage and major repairs. The downtime costs are often stated in the region of $1Million per hour.
Heat Exchangers & Pressure Vessels
ASME VIII & AS 1210 allow Engineers to design flanges specific to the application. In order to be competitive this often results in small as possible flanges. This in turn gives an un-reliable bolted joint. By controlling the bolt loads very accurately we prevent leaks and ensure integrity.
Slew Ring Bearings
Found on Cranes, Turrets and FPSO's these items have a history of bolt breakage and early bearing failure. By ensuring correct original pre-load, and adopting a regular re-measure regime, clients can get the maximum life between major re-fits.
Valves
Valves by their very nature often see high levels of thermal and pressure cyclic loading. In many cases this is coupled with stud-bolts screwed into tapped holes. Due to the lower than normal clamp length joint reliability is greatly reduced. By ensuring correct original pre-load we prevent joint failure.
Turbines
Due to creep strain relaxation half Joints & valves mostly have a requirement for bolt elongation to be highly controlled. Traditional Extensometer measurement methods are inaccurate and un-reliable; we replace that with a guaranteed accuracy of results (NATA Traceable) and electronic data management.
In addition to these we have also used this technology on High Performance Engines, Rotating Equipment Couplings, Furnaces, Structural Steelwork, Manifolds & many more.

 泰亚赛福 ―― 世界领先的检测仪器集成供应商


 您当前的位置:

 加入对比
加入对比

